Creating a Timeline in Microsoft Project
In this article, will delve a little deeper into how to create a timeline within Projects.
For instructor-led Microsoft Project training in Los Angeles call us on 888.815.0604.
In this article, we will learn how to:
- Show and hide the timeline
- Customize timeline tasks
- Change the font for individual timeline items
Showing and Hiding the Timeline
By default, no matter what view you have applied, the timeline will always be displayed just below the ribbon. If you don’t need it, you can hide it to give yourself more room to work inside the Project window. To hide the timeline, click the View tab and deselect the Timeline checkbox:

The timeline will now be hidden:
Show the timeline again by ensuring that the Timeline checkbox on the View tab is selected. Close Microsoft Project 2013 without saving your changes.
Customizing Timeline Tasks
To add an existing task to the timeline, first select the task in question. For this example, select the “Choose New Product” task. Then, click Task → Add to Timeline:
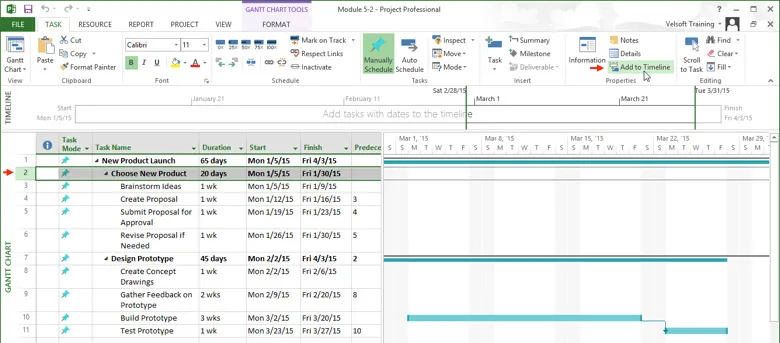
The selected task will now appear on the timeline:

Alternatively, you can add existing tasks to the timeline by clicking anywhere on the timeline to select it and then clicking Timeline Tools – Format → Existing Tasks:

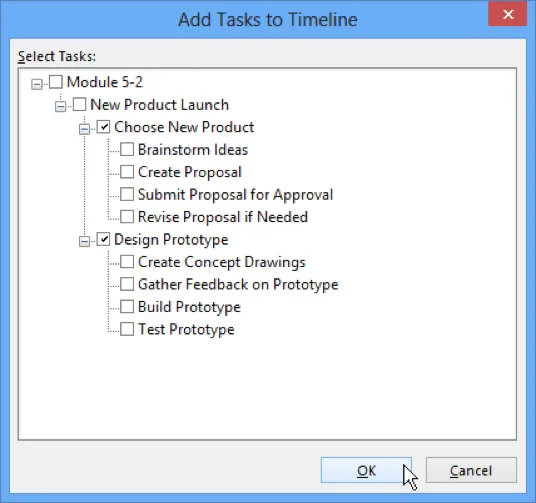
Once this command has been selected, the Add Tasks to Timeline dialog will open. This dialog lists all of the tasks that are found in your project. You may add or remove any of these tasks by clicking their corresponding checkboxes. For this example, ensure that the checkboxes for both of the summary tasks (“Choose New Product” and “Design Prototype”) are selected. Click OK:
Both summary tasks will now appear on the timeline:

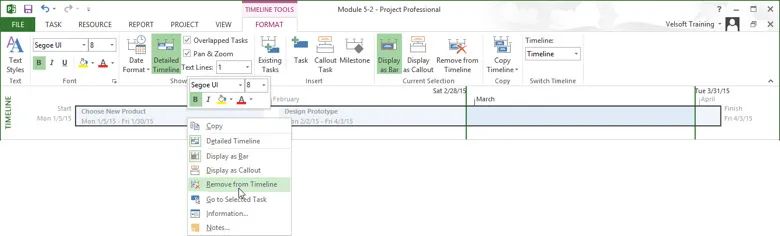
Remove the “Choose New Product” summary task from the timeline by right-clicking on its timeline entry and clicking “Remove from Timeline:”
Close Microsoft Project 2013 and save your changes.
Changing the Font for Individual Timeline Items
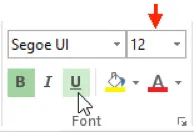
To adjust the font used for each task on the timeline, click to select the task in question on the timeline. For this example, select “Choose New Product.” Then, click in the timeline to select it. Examine the controls found inside the Font group of the Timeline Tools – Format tab:

Here, you can see controls to apply various text effects; change the font type, color, size; and more. For this example, increase the font size to 12. Also, apply the underline effect:
The changes will now be applied to the selected task:

Close Microsoft Project 2013 and save your changes.
