Tracking Changes in Microsoft Word
In this article, we will learn how to:
- Track changes made to your document
- Navigate through tracked changes
- Read Part 2 of this article here
Need training in Microsoft Word? We offer onsite training countrywide and public Word training in Los Angeles.
Tracking Changes
When change tracking is enabled, Word will keep track of the changes that are made. This includes text insertions, deletions, new images, and more. To enable change tracking, click Review → Track Changes:
![]()
Once Track Changes has been enabled, you can work with the document as normal. However, all of your changes will be recorded and noted. These changes are referred to as markup, as they literally mark up your document (as if you were editing it on paper).
Delete the first sentence in the sample document (“Before you begin, you must know what you’re branding.”). You will see that markup will appear where you made the changes:
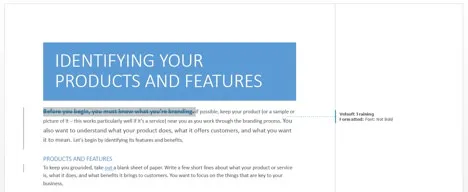
Click on this line to display markup details. You will see the changes that were made:

Click the markup line once again to hide the details. You can disable this feature at any time by clicking the Track Changes button again.
Save the changes that you have made to the current document and close Microsoft Word 2013.
Navigating Through Tracked Changes
As you can see, this document contains some markup. Click on any of the vertical lines to view the details of this markup:

The details of the markup will be shown. Here is a breakdown of what each type represents:

| Formatting Changes (1) | A line will connect the text to information in the margin about the changes that were made. |
| Deletions (2) | Deleted text is given a different color and strikethrough effect. |
| Insertions (3) | Inserted text is underlined and a different color. |
| All Changes (4) | A vertical line in the left margin will denote changed text somewhere in the adjacent line(s). Clicking on this line will hide or show the details. |
Word also offers a method to easily navigate through the markup. Click Review → Next (in the Changes group):

The first markup in the document will be selected:
Clicking this command again will select the next piece of markup on your document, while clicking Review → Previous will select the previous piece of markup. Once you reach the end of your document, clicking Next will select the first piece of markup on your page once again.
