Advanced Animation Techniques, Part One
In this article, we will introduce you to advanced animation techniques and how to use them in Microsoft PowerPoint.
For classroom based Mircosoft PowerPoint classroom training available in Los Angeles call us on 888.815.0604. Onsite PowerPoint training is available countrywide.
In this Article, we will learn how to:
- Choose a basic animation effect
- Set animation effect options
- Customize the trigger for an animation
Choosing a Basic Effect
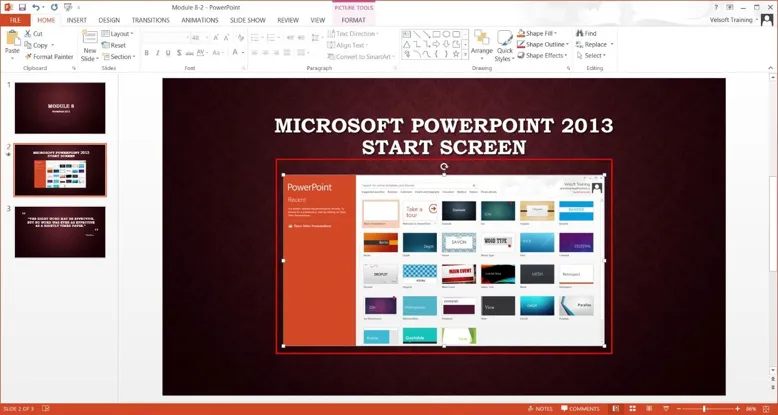
To apply an effect to a specific object in your presentation, you first need to select the object in question. For this example, click on the image on the second slide of the sample presentation:

Next, click the Animations tab. Examine the various animations that are available inside the Animation gallery. Click the More arrow () to expand the entire gallery:

As you can see, there are plenty of animations to choose from. At the bottom of the gallery, you will find commands to open various dialogs with a complete list of each type of animation:
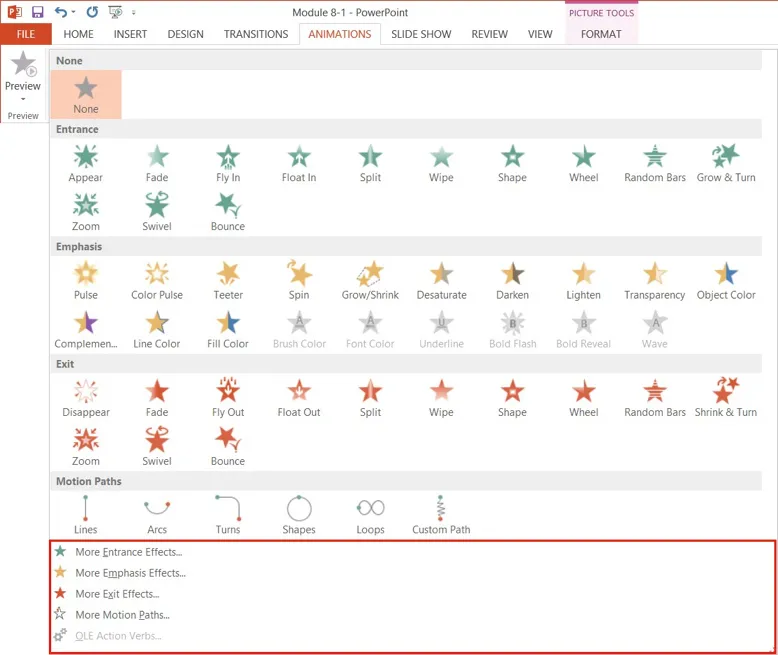
For this example, click outside of the gallery to close it. Then, click Fade:

The effect will be applied to the selected object and immediately previewed. Save the changes that you have made to the presentation and close Microsoft PowerPoint 2013.
Setting Effect Options
Some animation effects include options that allow you to customize how they operate. To start, select the object in question. For this example, select the image on the second slide in the sample presentation:
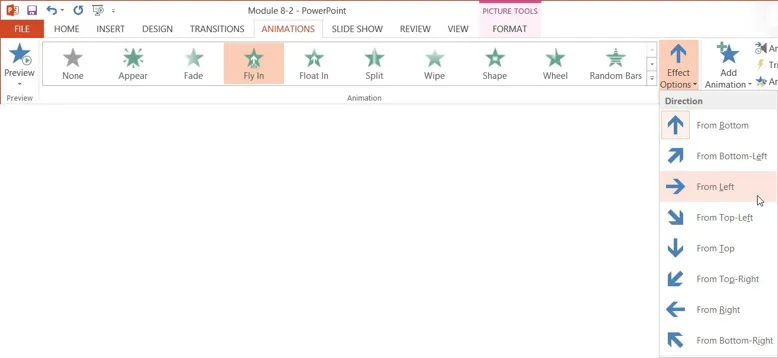
Next, click Animations → Effect Options:

The options in this menu will be different depending upon the type of effect that has been applied. In this case, the Fly In effect has been applied to the selected picture, so the options listed here control the direction of this effect. Click From Left:
The new effect option will be applied and previewed. Save the changes that you have made to this presentation and close Microsoft PowerPoint 2013.
Customizing the Trigger
In PowerPoint, you have the ability to set a special start condition for effects so that they run after you click an object. To view and apply these options, you first need to select an object that has an effect applied to it.
For this example, select the picture on the second slide in the sample presentation:

Next, click Animations → Trigger:

The first option in the drop-down menu is “On Click Of.” Click this option to see objects that you can choose from:
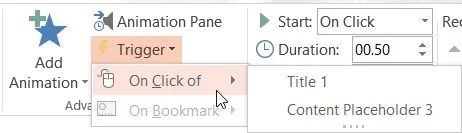
In this case, choosing either object will mean that you will have to click on the selected object in order for the animation to start. You can also have the animation play when you reach a bookmark.
