Microsoft Project Interface
The default view in MS Project is the Gantt Chart view. This consists of data tableon the left hand side of the screen and a Gantt bar chart on the right. The Divider Bar separates both sections and it can be moved to make each side bigger. The Gantt table looks like an Excel worksheet, consisting of rows, columns and cells. The Gantt bar chart graphically displays your project schedule.
For an instructor-led Microsoft Project class in Los Angeles call us on 888.815.0604.
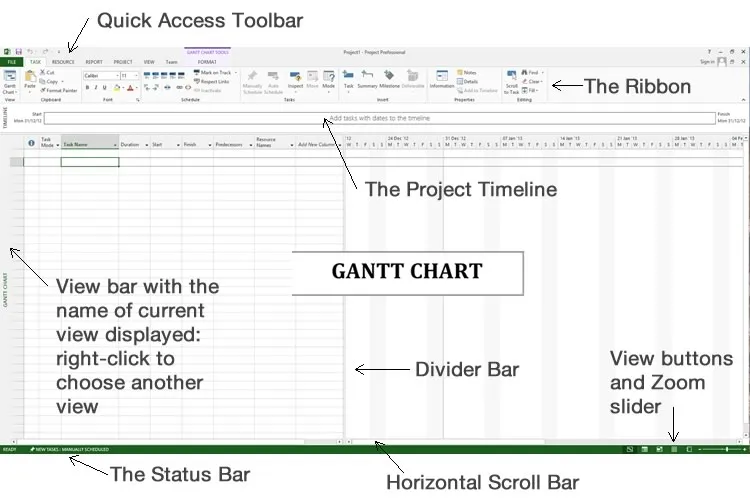
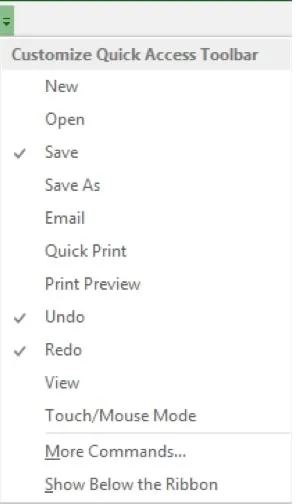
The Quick Access Toolbar
The Quick Access Toolbar is a fully customizable toolbar that displays above or below the Ribbon. Click the drop down menu on the right to customize the Quick Access toolbar.
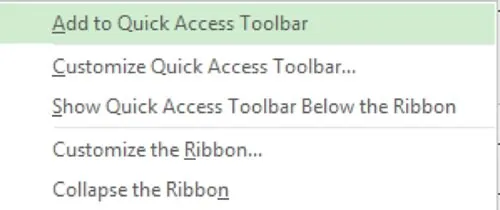
Tip: to add commands to the Quick Access Toolbar, right click any existing command and from the shortcut menu choose Add to Quick Access Toolbar:
The Ribbon

The Ribbon, consists of a series of tabs. Each tab contains a set of related commands organized into logical groups. Each tab relates to a type of activity, such as file taks, report tasks, view/layout tasks etc. The Format tab is unique in that the commands will change depending on what view or area of the screen is selected.
The Ribbon can also be minimized so you only see the tabs. To expand simply click on the tab you want to use, and then click the command you want to use.
Tip: To quickly minimize the Ribbon, double-click the name of the active tab. Double-click a tab again to restore the Ribbon. The Keyboard shortcut to minimize or restore the Ribbon is CTRL+F1. Read more about using the Ribbon in Microsoft Office.
The Status Bar
The status bar sits at the bottom of the screen and is used to indicate whether your tasks are manually or automatically scheduled or when filters are applied.

The Zoom Slider can be found on the right side of the status bar. You can change the Project views between the 4 main views namley the Gantt Chart view, Task Usage view, Team Planner view and Resource Sheet view - using the using the quick buttons to the left of the Zoom.

The Project Timeline
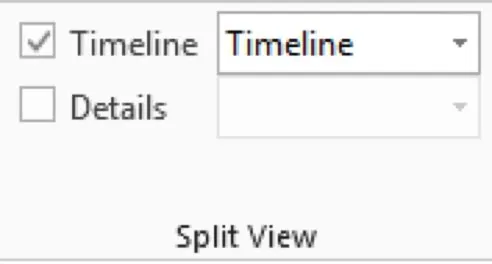
You can show or hide the Project timeline using the checkbox on the View tab.
The Timeline allows you to have a bird's eye view of your project plan. This can also be shared with other Office applications such as PowerPoint and Outlook. A useful resource is to download the MS Office product quick start guides.
You can use the Timeline to select different parts of the project to display or to zoom into any one area.

To format the Timeline first select it and then click the Format tab:

Note: When the Timeline is active, several of the commands on the Resources and Task tabs will be greyed out.Deselect the Timeline by clicking on the Gantt chart or Gantt table and then the commands will be available again.
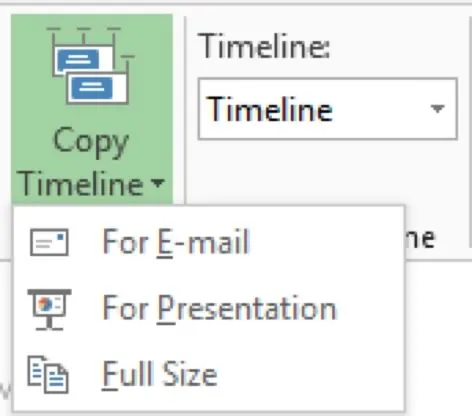
To share a copy of your timeline with a colleague or client, click on the Copy Timeline command. This will allow you to paste a picture of your project into an email.
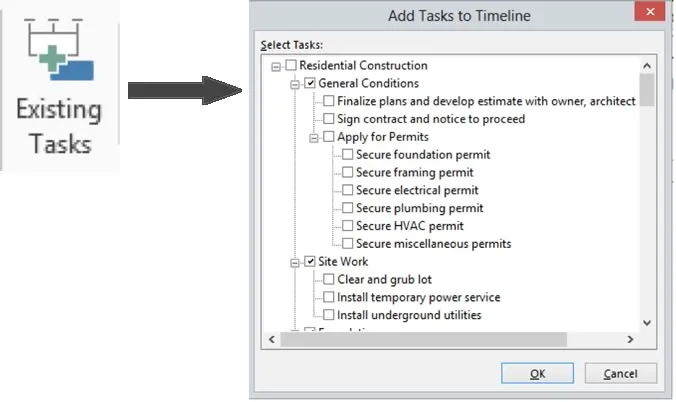
Use the Existing Tasks command to display specific tasks on the timeline.
Smart Tip: You can also drag and drop tasks onto the Timeline.
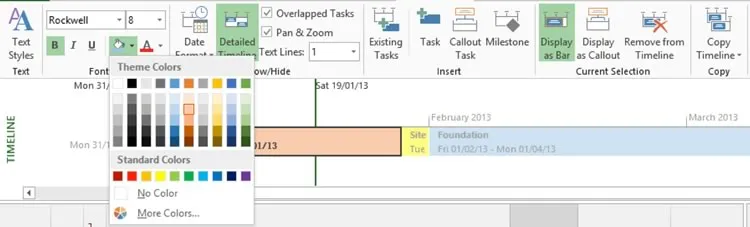
You can Right click on the Timeline to change how tasks are displayed. They can either be displayed as a bar or as a callout.

You can also apply formatting to tasks on the Timeline. Simply click the relevant task and using the font commands on the format tab.
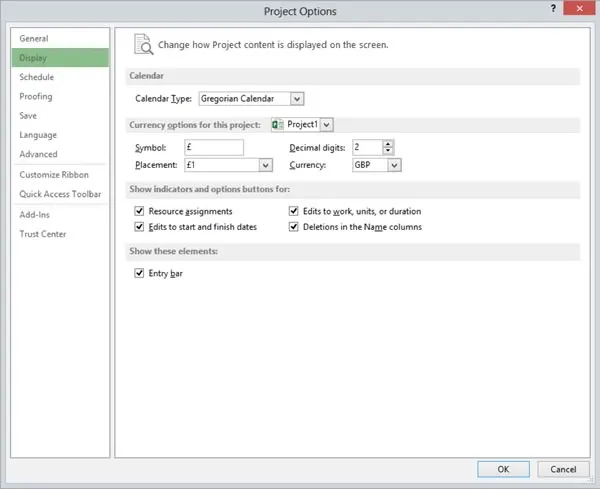
The Entry Bar
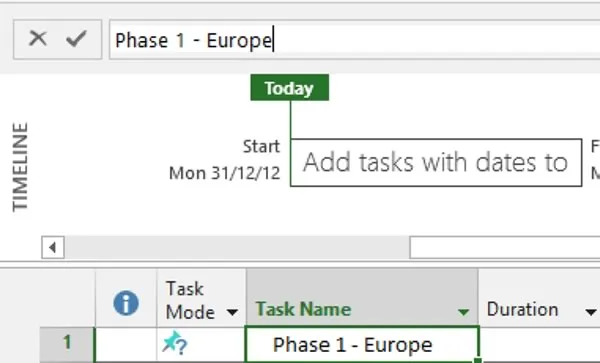
The Entry Bar allows you to add and edit the content of a cell.
Unlike previous versions of Project, in Project 2013 the Entry Bar is not displayed by default. To display the Entry Bar use one of the following 4 methods:
- Click the File Tab
- Click Options
- Click Display
- Click the option to show the element Entry Bar:
Also see how to start your first project using MS Project or visit additional Microsoft Project resources.
