Recording Macros in Microsoft Excel
If you perform certain opertations over and over in Excel, you can record a macro which stores all the steps, and when you run the macro it will automatically perform each step automatically save you a lot of manual repetitive work.
If you need to add more steps to a macro, or change existing steps, you can edit a macro. You edit macros in the Visual Basic Editor, using the Visual Basic programming language. If you no longer need a macro, you can delete it. In addition, you can create macros that use relative references, similar to creating formulas that use relative references.
For more details of Excel Macro training in Los Angeles call us on 888.815.0604. Our classes are hands-on instructor-led. Learn Macros from a live certified trainer.
Recording a Macro
The easiest way to create a macro is to record it. In the Record Macro dialog box, shown in Figure 2-1, you can give your macro a name and a description. Although Excel provides default names and descriptions for macros, entering your own names and descriptions lets you identify and keep track of your macros, especially if you have a large number of macros. Once you have finished recording, you stop the recording by clicking the Stop Recording button in the Code group on the Developer tab, shown in Figure 2-2.
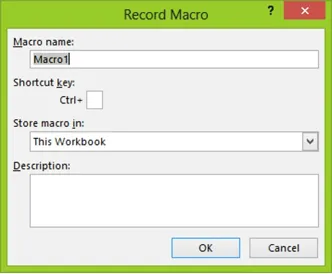
Figure 2-1: The Record Macro Dialog Box
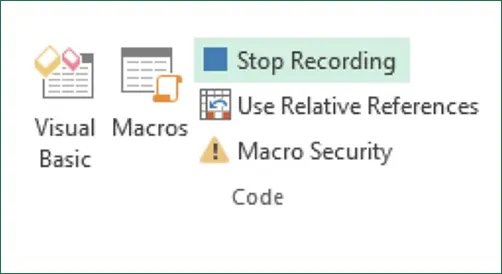
Figure 2-1: The Stop Recording button - Illuminated
NOTE: The Ribbon is a component of the Microsoft Office Fluent user interface. But the Developer tab may not be in view on a standard Excel 2010 installation. Also, Macro recording and other macro options may have been disabled by your system administrator, or not enabled in the first place.
If the Developer tab is not available, do the following to display it:
- Click the Microsoft File Button and then click Excel Options.
- In the Popular category, under Top options for working with Excel, select the Show Developer tab in the Ribbon check box, and then click OK.
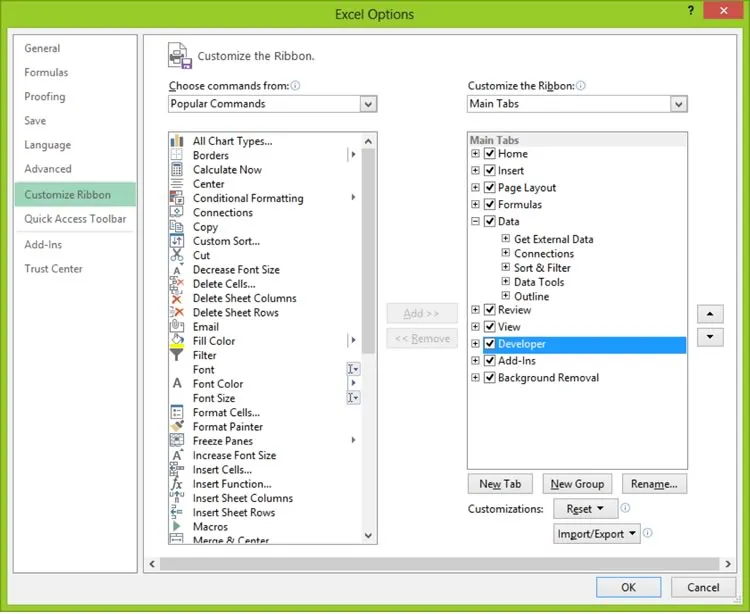
Figure 2-3: Setting the developer Tab on
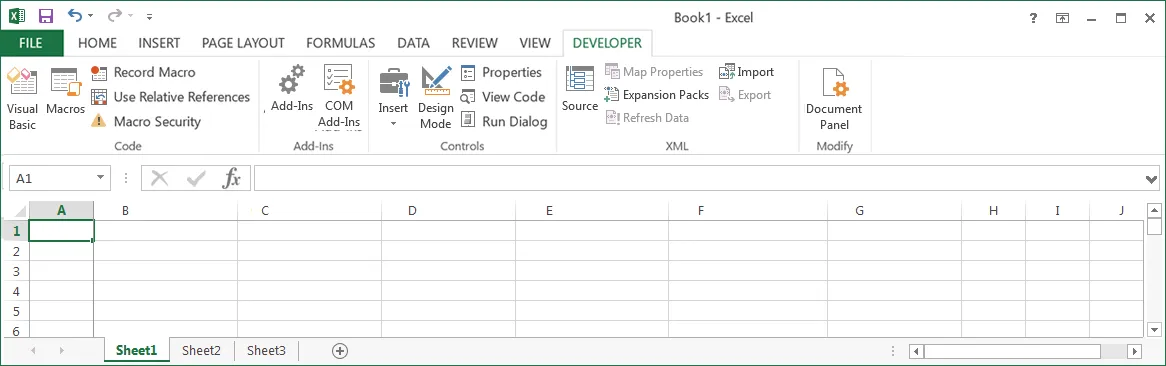
Figure 2-4: Developer Tab
To set the security level temporarily to enable all macros, do the following:
- On the Developer tab, in the Code group, click Macro Security.
- Under Macro Settings, click Enable all macros (not recommended, potentially dangerous code can run), and then click OK.
NOTE: To help prevent potentially dangerous code from running, we recommend that you return to any one of the settings that disable all macros after you finish working with macros.
When you record a macro, Excel saves all your keystrokes and menu choices in the exact order in which you performed them, with the exception of certain mouse movements. For example, if you access the Format Cells dialog box by clicking the Format button in the Cells group (Home tab) and selecting Format Cells in the drop-down list, then make certain desired formatting selections, Excel only records the selections, not the path you took to the dialog box.
Steps to Record a Macro
To record a macro:
- In the Code group on the Developer tab, click the Record Macro button.
- In the Record Macro dialog box, in the Macro name text box, enter a name.
- If desired, in the Description text box, enter a description.
- Choose OK.
- Choose commands or enter data you want to store in the macro.
- Click the Stop Recording button in the Code group to stop the recording.
Next - see how to run a Macro.
