Microsoft Visio Interface
Visio 2010 has a new interface that builds on interface from the previous version of Visio. Visio 2010 uses the ribbon interface that was introduced in Microsoft Office 2007 applications. Each tab in the ribbon contains many tools for working with your drawing. To display a different set of commands, click the tab name. Buttons are organized into groups according to their function.
In addition to the tabs, Visio 2010 also makes use of the Quick Access Toolbar from the MS Office 2007 applications. The File tab is a new feature that opens the Backstage View. The new Backstage View will be discussed in the next topic. Below is the Visio interface, including the Ribbon, the Slides tab, the Slides pane, the Quick Access toolbar, and the Status bar.
Did you know, we are an industry leading software training company and we offer instructor-led Visio classes in Los Angeles. For friendly, fun and informative training out why not give us a call on 888.815.0604.
For an instructor-led Microsoft Visio class in Los Angeles call us on 888.815.0604.
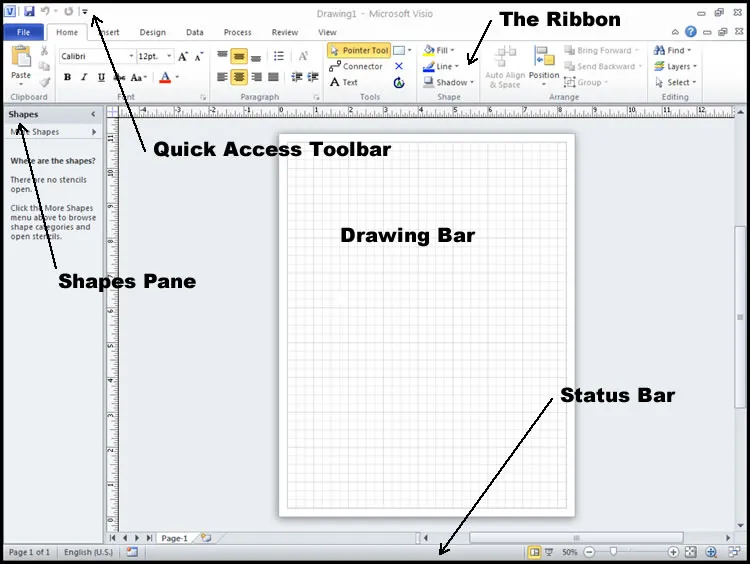
- The Shapes panel shows a thumbnail of shapes and/or stencils.
- The Drawing pane is where you can view and edit the entire drawing.
- The Status Bar provides information about your drawing and has additional tools for making changes to the view.
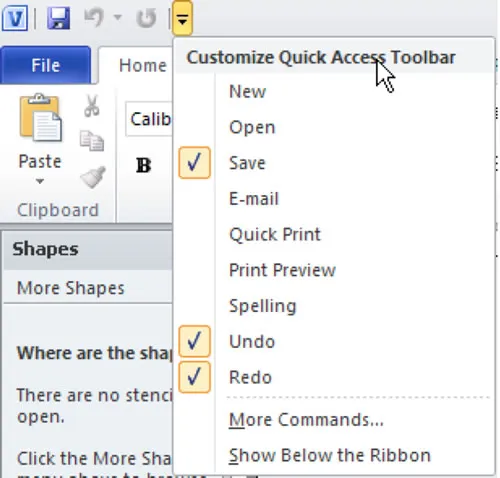
The Quick Access Toolbar appears at the top of the Visio window and provides you with one-click shortcuts to commonly used functions. By default, the Quick Access Toolbar contains buttons for Save, Undo and Redo.
Use the following procedure to customize the contents of the Quick Access toolbar.
-
Click the arrow icon immediately to the right of the Quick Access toolbar.

-
Add an item to the Quick Access Toolbar by selecting it from the list. You can remove an item by reopening the list and selecting the item again.
If you select More Commands, Visio opens the Visio Options window.
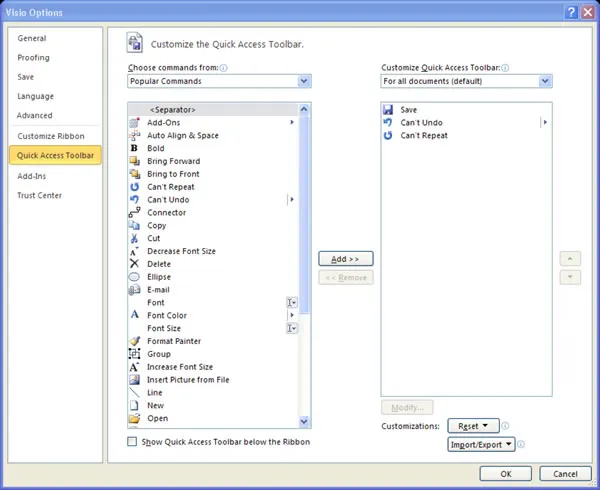
To add a command, select the item from the list on the left and select Add. Select OK when you have finished. Read more about customizing the Visio Ribbon.
Using Backstage View
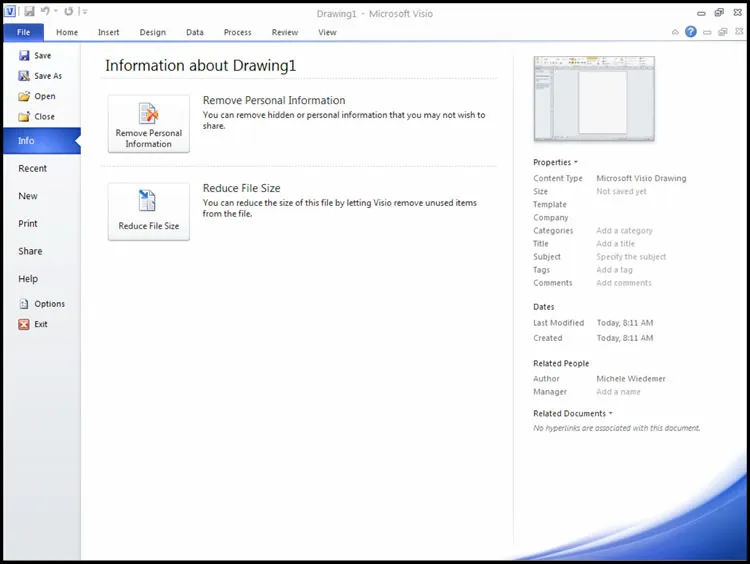
Select the File tab in the Ribbon to open the Backstage view. The Backstage view is where you will find the commands for creating, saving, opening, and closing files, as well as information about the file. The Backstage view includes new interfaces for printing and sharing your drawings. The Options command is also available to open a new screen for setting your Visio Options.
Use the following procedure to open the Backstage View.
- Select the File tab on the Ribbon.
Visio displays the Backstage View, open to the Info tab by default. A sample is illustrated below.
Creating a Blank Drawing
The New tab of the Backstage view provides several options for creating new drawings. The Blank Document option is at the bottom of the screen under “Other Ways to Get Started.”
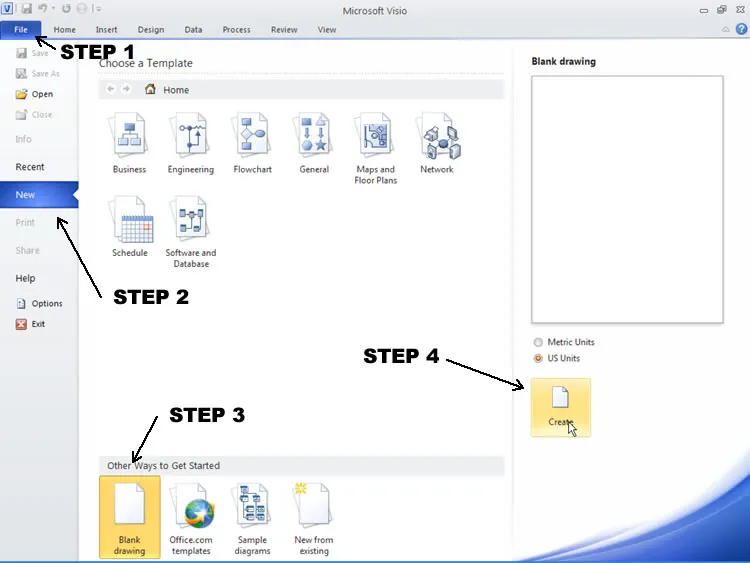
Use the following procedure to create a blank drawing.
- Select the File tab on the Ribbon.
- Select the New tab in the Backstage View.
- Select Blank Drawing.
- Select Create.
See tutorial on how to setup the screen in Visio. Download a Microsoft Visio quick start guide.
