Performing Basic Table Tasks in Access
This lesson focuses on tables. You’ll learn how to enter and edit data in the Datasheet view of a table. Next, we’ll look at using the clipboard to cut, copy, and paste data to and from different fields.
For instructor-led MS Access classes in Los Angeles call us on 888.815.0604.
Entering and Editing Data
In this lesson, we’ll take a look at entering and editing data, which works much the same as it did in the app.
To enter data using a variety of data types, use the following procedure.
In the example table, the first field is a multi-answer lookup column. The options appear as checkboxes.
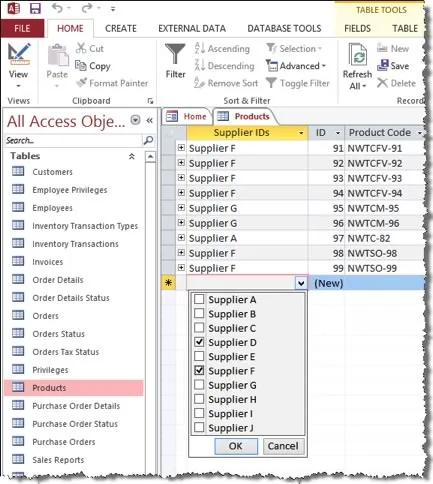
- Check one or more boxes to enter the data for this field. Select OK.
- Press Enter or Tab to move to the next field.
In a new record, the Primary Key field (in this example, labeled ID) says New at first, until you start entering information. Then Access enters the next number.
-
The following fields are TEXT fields. Enter text to complete the information.
- Product Code
- Product Name
- Description
- Quantity per Unit
- Minimum Reorder Quantity
-
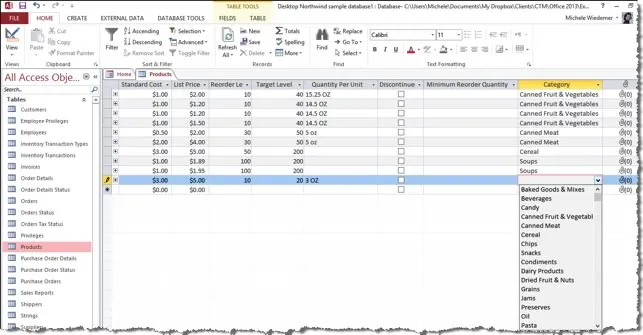
The following fields are CURRENCY fields. Enter a number, with a decimal for cents, if applicable.
- Standard Cost
- List Price
-
The following fields are NUMBER fields. Enter a number.
- Reorder Level
- Target Level
- The Discontinue field is a YES/NO field. Check the box, if applicable.
- The Category field is a Lookup column (drop down list). Select an item from the list.
The final field allows attachments.
To edit a record. Let’s imagine that one of the Northwind customers got a promotion, with a new title and contact information. This example uses the Customers table from the sample database.
- Highlight the information you want to change.
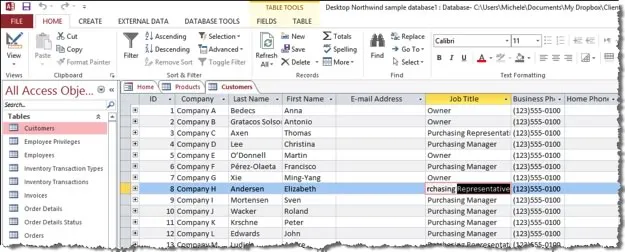
- Enter the new information. After you have entered the new information, close the table. There is no need to save - Microsoft Access saves the new information in the table automatically.
Using the Clipboard
Tables make up the backbone of your database. Tables have relationships to connect data without having to store it in multiple places.
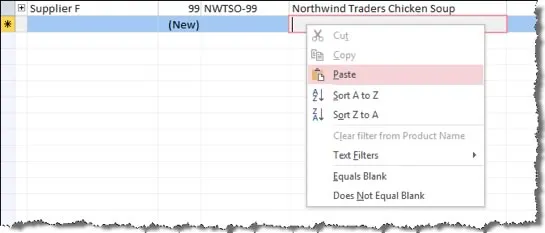
Just as with other applications, you can use the Clipboard to cut, copy, and paste information from one place to another. We’ll practice these tasks in Datasheet view. To cut and paste text, use the following procedure.
- Highlight the text you want to cut.
- Select Cut from the Home tab on the Ribbon.

- Move the cursor to the new location.
- Right click the mouse and select Paste from the context menu.
To copy and paste text using the keyboard shortcuts, use the following procedure.
- Highlight the text you want to cut and press the Control key and the C key at the same time.
- Move the cursor to the new location.
- Press the Control key and the V key at the same time.
To open the Clipboard Task pane, use the following procedure.
- On the Home tab of the Ribbon, select the icon next to Clipboard.

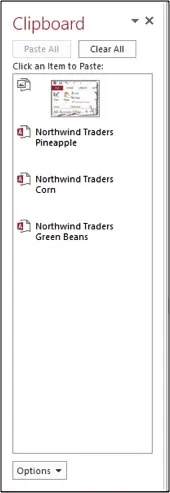
The Clipboard pane opens, displaying any items you have cut or copied in this Word 2013 session (or the 24 most recent). A sample is illustrated below.
To paste using the Office Clipboard Task pane, use the following procedure.
- Place the cursor where you want to paste text from the clipboard.
- Click on the item in the Clipboard task pane that you want to paste.
You can copy and paste data from another program like Excel or Word into an Access table. This works best if the data is separated into columns. If the data is in a word processing program, such as Word, either use tags to separate the columns or convert the columns into a table format before copying.
- If the data needs editing, such as separating full names into first and last names, do that first in the source program.
- Open the source and copy (Ctrl + C) the data.
- Open the Access table where you want to add the data in Datasheet view and paste it (Ctrl + V).
- Double-click each column heading and type a meaningful name.
- Click File > Save and give your new table a name.
Note that Access sets the data type of each field based on the information you paste into the first row of each column, so make sure that the information in the following rows match the first row.
