Working With Records in Microsoft Access
For hands-on Access training in Los Angeles call us on 888.815.0604.
In this Article, we will learn how to add, edit, search, browse, delete, and print records in a database.
Adding and Editing Records
To add records to a table, you have the option of entering them manually, using a form, or using the import tools on the External Data tab. As the database we are using does not have a form for it yet and we do not have external data we can import into it, we will add records manually.
To add records to a table in Access manually, ensure that the table in question (Expenses) is open and that Datasheet View is applied:

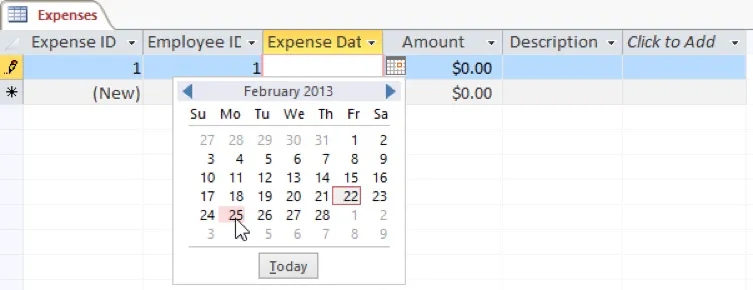
Click inside the Employee ID field and type “1” (replacing the “0”). Press the Tab key to advance to the Expense Date field. Click the small calendar icon that appears beside this field:

From the small calendar that appears, click Monday of next week:
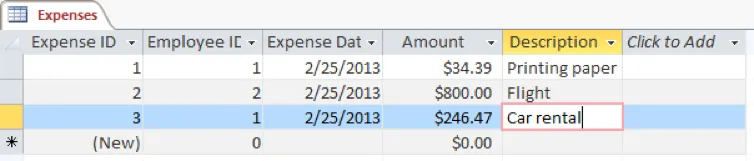
Press Tab again to advance to the next field. Type “34.39” and press Tab. In the Description field type “Printing paper:”

Repeat the previous steps to add the following information:
You may edit information using the same method: simply place your cursor inside the field you wish to edit and type.
Save your database.
Searching and Browsing Records
When viewing a table, you can browse records easily using the controls in the small toolbar at the bottom of Datasheet View:
![]()
Click the Next button to select the next record. Click the Previous buttonto select the previous record. The First button will select the first record in the table and the Last button will select the last record in the table.
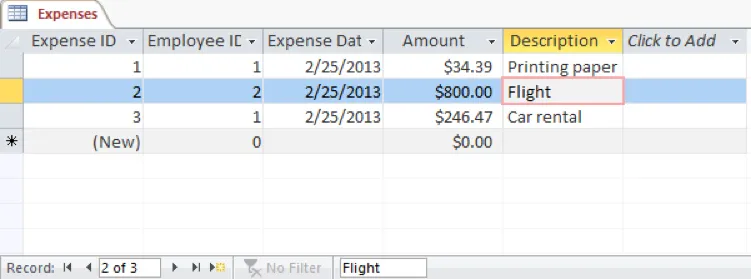
Using this toolbar, you can also search the records in the current table. Click inside the Search field and type “Flight.” As you type, Access will search the table in real time. Any records that match the keywords you entered will be selected. In this example, the second record will be selected:
Deleting Records
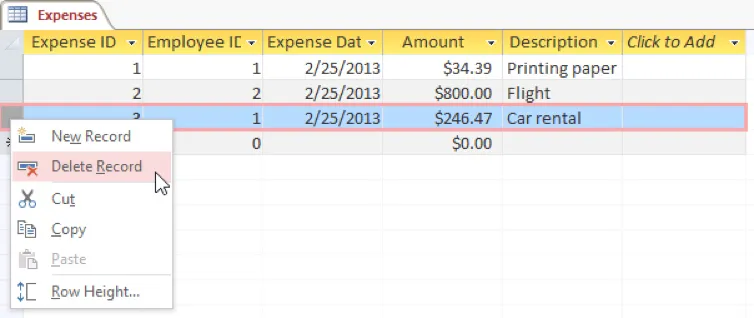
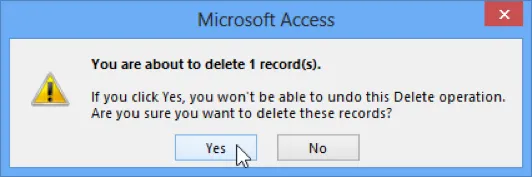
To delete a record using Datasheet View, right-click the record header for the record in question and click Delete Record. Try using this method to delete the third record in the Expenses table:
A dialog will be displayed that asks you to confirm your choice to delete the selected record. Click Yes to continue:
The record will then be deleted from the table. Save your database.
Printing Records
To print specific records, first select the records you wish to print. For this exercise, select only the second record by clicking on the record row header:

With the record selected, click File → Print → Print:

When the Print dialog appears, ensure that the Selected Record(s) radio button is selected:
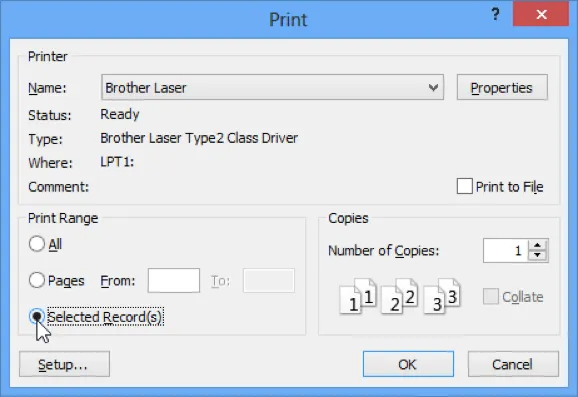
Using this dialog, you can choose what printer you would like to print with, as well as how many copies of the item you would like printed. Click OK to print the selected record.
Close Microsoft Access.
