Maintaining a list in Excel
Excel provides an easy-to-use tool called the data form to maintain lists. Hardened spreadsheet users generally prefer to edit data in lists in the worksheet cells. In other words, in-cell or in-line editing. But many Excel users, particularly those fairly new to Excel, like the Data Forms or simply ‘Form’ feature in Excel.
The data form is a friendly, easier-on-the-eye input and data records analysis tool. It displays the data from your list one record at a time, letting you add, delete, or modify records in a list. It’s true that it is indeed easier on the eye to look at each record in its own form rather than as a line of cell data entries.
Using the Data Form
The data form, shown in Figure 1-3, displays each field in the selected list. Each column label, or field name, is located on the left side of the form, and the field information is listed in edit boxes. If a column in the list contains a formula, the corresponding values will appear in the data form without edit boxes. You use the scroll bar to move between records. On the right side of the window are list management buttons that let you add new records, delete records, or modify records in your list. Each data form can display as many as 32 fields. If the list contains more than 32 fields, only the first 32 fields will appear in the data form.
For hands-on Microsoft Excel training classes in Downtown LA call us on 888.815.0604.

Figure 1-3: The Data Form
Accessing the Form feature in Excel 2013
Excel's built-in data entry form is not present in the Excel 2013 UI. To use the feature, you must customize your Quick Access Toolbar and add the Form command from the Commands Not in the Ribbon group. See below as an exercise in Quick Access toolbar customizing.
Note that at the top of the Excel 2013 screen (in a defaults Excel setup), the Quick Access Toolbar will look similar to this:

Figure 1-4: The Standard Excel Quick Access Toolbar
Of course, you can add your own items to the Quick Access Toolbar. As mentioned above, Data Forms are not on the Excel Ribbon, but are tucked away in the exhaustive list of 2013 additional features and options. So we'll add the Data Forms icon to the Quick Access Toolbar.
To find Data Forms, click on the File Button, then click on Excel options at the bottom:
When you click the Excel Options button, you'll see this dialogue box pop up:

Figure 1-5: Excel Options (Customized Quick Access Toolbar Tab)
Click the Customize button on the left. The idea is that you can place any items you like on the Quick Access toolbar at the top of Excel 2013. You pick one from the list, and then click the Add button in the middle.
To add the [Data] Form option to the Quick Access Toolbar, click the drop down list where it says Choose Commands From. You should see this image excerpt of the drop-down list.
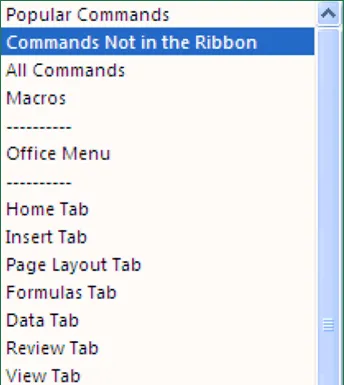
Figure 1-6: Selecting Commands Not in the Ribbon
Click on Commands Not in the Ribbon. The list box will change:
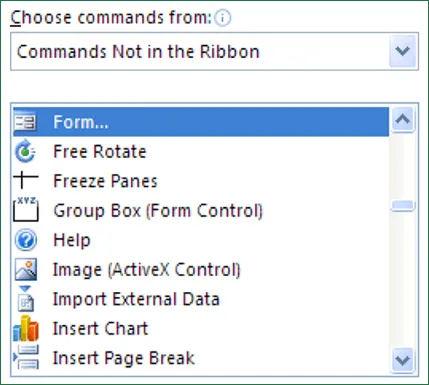
Figure 1-7: The List of Commands not in the Ribbon
From the Commands Not in the Ribbon list, select Form. Now click the Add button in the Middle. The list box on the right will then look something like this one:

Figure 1-8: The Quick Access Toolbar is about to change
When you click OK on the Excel Options dialog box, you'll be returned to Excel 2013. Look at the Quick Access toolbar, and you should see your new item:

Figure 1-9: The Updated Quick Access Toolbar
Method
To open the data form:
- Select a cell in the list.
- On the Quick Access Toolbar, click the Form button.
To move between records using the data form:
- Choose Find Next or click the lower scroll arrow to move to the next record in the list. or
- Choose Find Prev or click the upper scroll arrow to move to the previous record in the list. or
- Drag the scroll box until the desired record number appears in the upper right corner of the data form.
To close the data form:
- Choose Close. or
- Click the Close button.
Exercise
In the following exercise, you will open the data form, scroll through records in the data form, and then close the data form.
- Select a cell in the list.
- On the Quick Launch Toolbar, click the Form button. [The data form appears, displaying 1 of 4 in the upper right corner. The data for record 1 appears in the edit boxes, and the data in the ID NO edit box is highlighted].
- Click the bottom scroll arrow until the data for the Chevy Astrovan appears. [4 of 4 appears in the upper right corner of the data form].
- Drag the scroll box to the top of the scroll bar. [The record number changes as you scroll, displaying 1 of 1 when finished].
- Choose Close. [The data form closes].
Adding and Deleting Records Using the Data Form
You can easily add a new record to a list using the data form. When you choose New, Excel blanks out all the edit boxes in the form and the words “New Record” appear in the upper right corner of the data form. Deleting records using the data form is a permanent operation that cannot be undone.
Method
To add records using the data form:
- Open the data form. [The data for record 1 appears in the edit boxes].
- Choose New. [All edit boxes are blank, and New Record appears in the upper right of the data form].
- In the ID NO edit box, type 18. [The Restore button is active].
- Repeat steps 2 and 3 to add additional records.
- Choose Close to add the last record and close the data form. or
- Choose New or scroll to a record to add the last record and keep the data form open.
To delete records using the data form:
- Open the data form.
- Move to the record you want to delete.
- Choose Delete.
- In the confirmation box that appears, choose OK.
- Choose Close when finished.
Exercise
In the following exercise, you will add and delete records using the data form.
- Open the data form. [The data for record 1 appears in the edit boxes].
- Choose New. [All edit boxes are blank, and New Record appears in the upper right of the data form].
- In the ID NO edit box, type 18. [The Restore button is active].
- Press Tab. [The insertion point moves to the next edit box].
- In the appropriate edit boxes, enter the remaining data for the Pontiac Sunbird as shown in Figure 1-10.
- Choose New. [The new record is added to the list and a new blank record appears].
- Add the record for the Ford Festiva as shown Figure 1-10, and then choose New.
- Use the scroll arrows to select the record for the Ford Taurus.
- Choose Delete. [A confirmation box appears, stating, “Displayed record will be permanently deleted”].
- Choose OK. [The record is deleted].
- Close the data form, and then save and close the workbook.
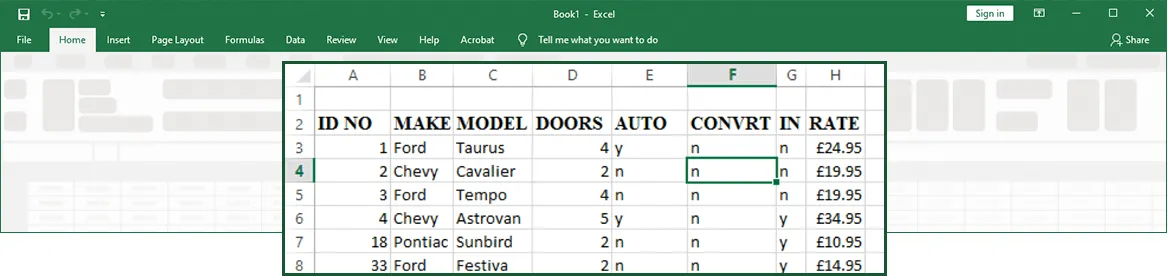
Figure 1-10: New List Data
