Getting to know the Photoshop Interface
These topics are covered in Module 1 - Getting to know Photoshop, part of our Beginner Photoshop class.
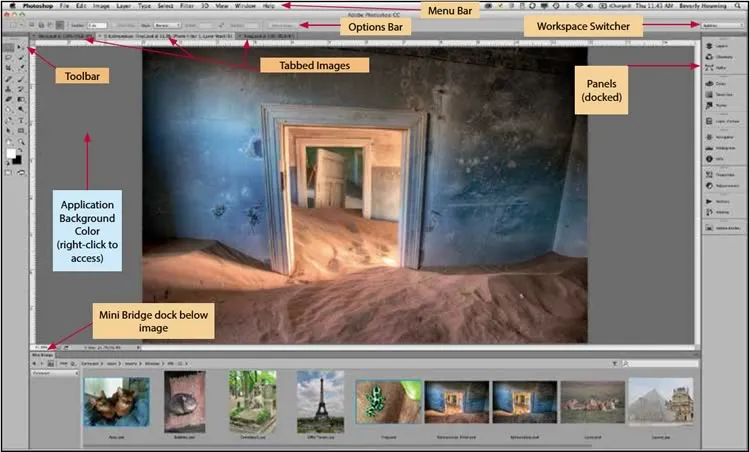
The Menu Bar across the top organizes commands under menus.
The Application Bar is no longer in Photoshop CC, since the interface has been streamlined.
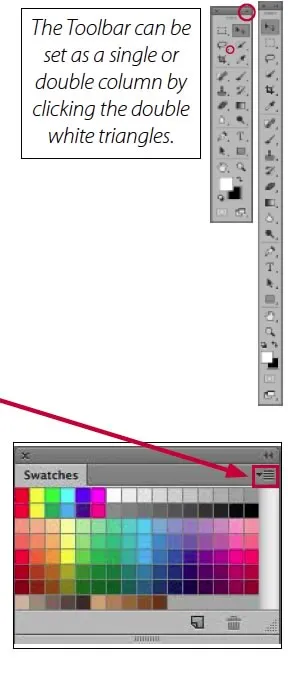
The Toolbar contains tools for creating, selecting and editing images.
Related tools are grouped together indicated by a small triangle in the bottom right corner.
The Options Bar displays options for the currently selected tool.
The Document Window displays the images you're working on.
Panels help you monitor and modify your work. Certain panels are displayed by default, but you can add any panel by selecting it from the Window menu. Panels have menus with panel-specific options.
The Panel Menu is accessed by clicking on the icon at the top right corner of the panel to expand it.
A Dock is a collection of panels or panel groups displayed together, generally in a vertical orientation. You dock and undock panels by moving them into and out of a dock.
To dock a panel, drag it by its tab into the dock, at the top, bottom, or in between other panels.
To dock a panel group, drag it by its title bar (the solid empty bar above the tabs) into the dock.
To remove a panel or panel group, drag it out of the dock by its tab or title bar. You can drag it into another dock or make it free-floating.
For instructor-led Adobe Photoshop classes in Los Angeles call us on 888.815.0604.
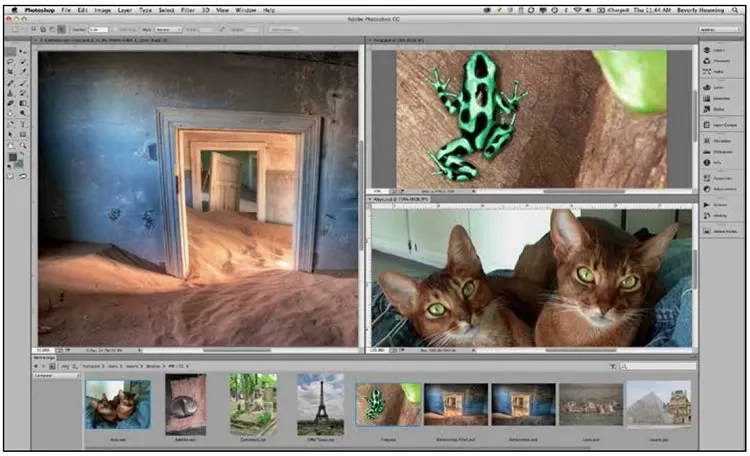
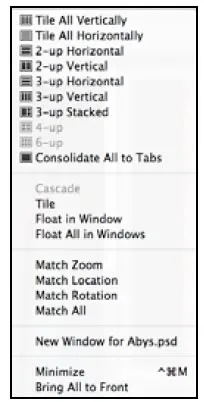
The interface can be tabbed, showing one image or tiled showing multiple images at a time.
Choose Window > Arrange, you can tile all open images in n-up views or float them in separate windows.
Consolidate All to Tabs shows only one image at a time.
Photoshop CC Preferences
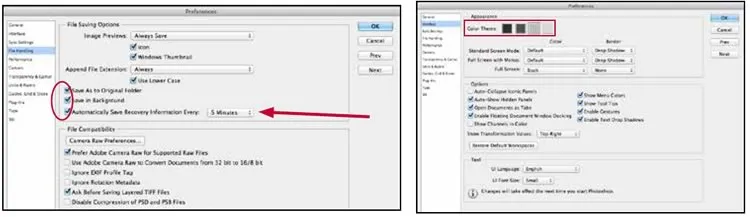
To access the application preferences, choose Photoshop > Preferences (Mac) or Edit > Preferences (PC) (Cmd/Ctrl + K).
One of the new features is the ability to change the interface color theme to make viewing,color correcting and editing your images easier. Photoshop auto-saves your work so that if the application crashes, it will restore your image based on the last time is was saved, whether you saved the file manually or not.
Photoshop CC Workspaces
The Options Bar offers a shortcut to access your Workspaces via the switcher.
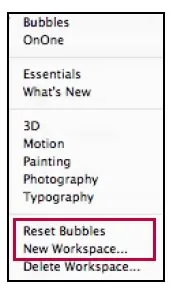
By saving the current size and position of panels as a named workspace, you can restore that workspace even if you move or close a panel. The names of saved workspaces also appear in the Window > Workspace menu.
Choose New Workspace to save a custom workspace.
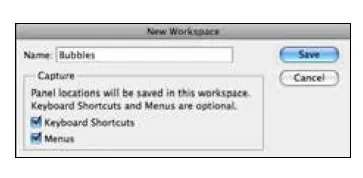
The saved workspace can include a specific keyboard shortcut set and menu set in addition to panel locations.
If changes are made to a Workspace, choose New Workspace and retype the exact name to save over it and update it. To put the panels back in the right location, choose Reset (name).
If you have Workspaces saved form CS6, you can Migrate them.
Custom Keyboard Shortcuts & Preferences
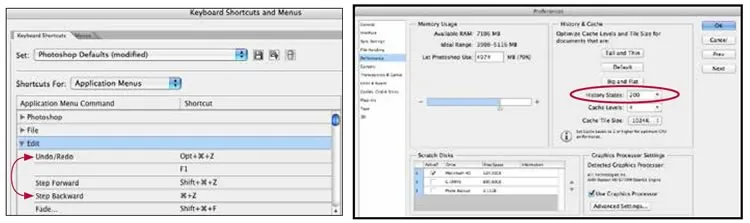
Set up Multiple Un-do's in Photoshop by exchanging your keyboard shortcuts of Undo/Redo and Step Backwards.
>Choose Photoshop > Preferences (Mac) or Edit > Preferences (PC).
In the Performance section you can increase the number of History States.
The number of History States determines how many "undo's" there are.
The default is only 20, so increase the number to 200 or more.
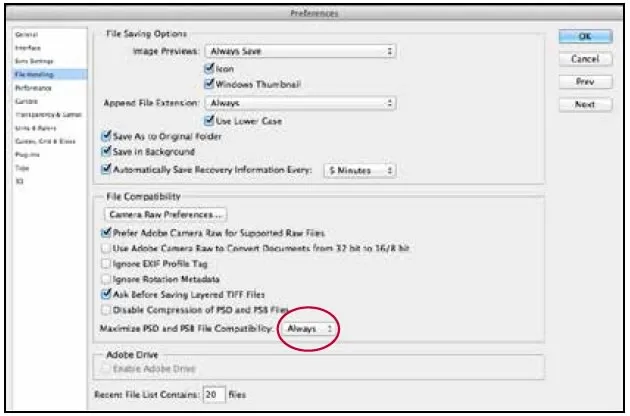
Another Preference worth changing is the compatibility question this comes up whenever a native Photoshop file (PSD) is saved and a dialog box requires a decision to maximize the compatibility of the file. To permanently eliminate this, change the Preference in the Interface section from "Ask" (the default) to "Always" in the File Handling section.
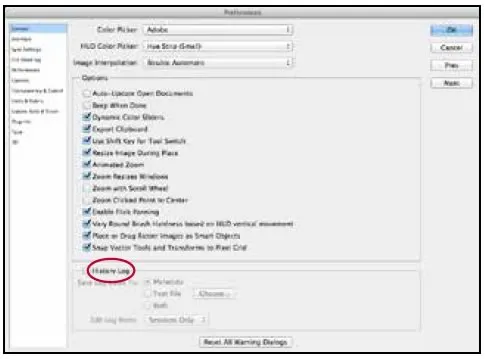
The history of edits done to the file can be captured as text or metadata by selecting the History Log in Preferences.
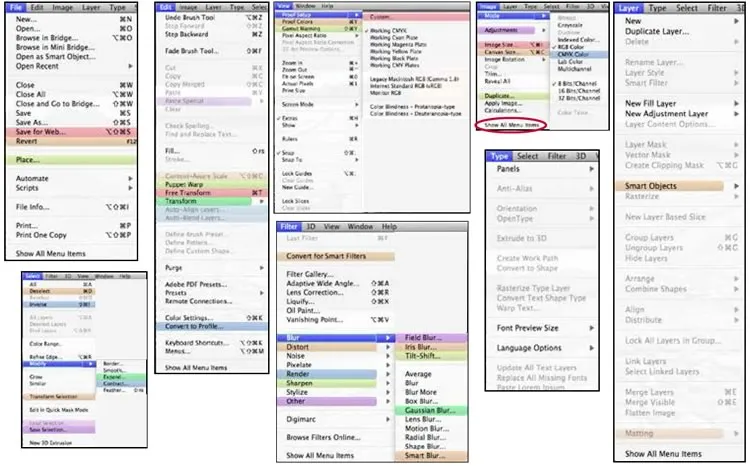
Menu Customization
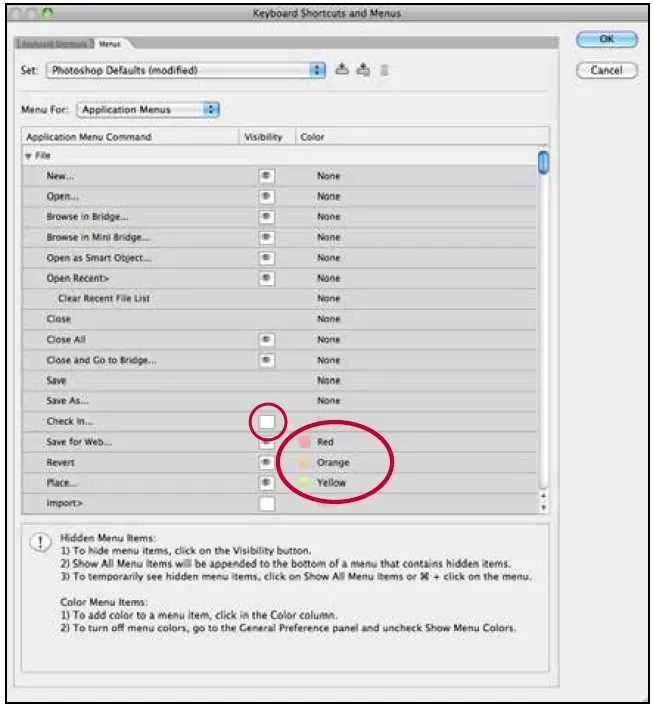
Choose Edit > Menus to customize menus by turning off visibility of never used items and color coding on for more important ones.
Click the eye icon to turn on/off a particular menu item. Click the None option in the Color field to display a list of color labels to apply to that menu command.
When menus have been customized, they will show (modified) after the name of the menu set. To keep these changes, save your Workspace again with the same name and make sure the Menus option is checked.
Once the menus have been customized they will show their color coding on the commands specified.
When a menu has items hidden, the bottom will have an option to Show All Menu Items and temporarily expand it.
-
Address
915 Wilshire Blvd,
Suite 1800.
Los Angeles CA 90017 - Phone (888) 815-0604
- Email Show Email
In person v online training
In line with state protocals we have now fully resumed in person or classroom training.
Trainees still have the option of joining any of our classes remotely via Zoom webinar.
To attend any clasess remotely first add any class to your
cart and then click the small check box below the class. See screenshot below.

You will receive webinar login details for your training 2-3 working days before your class is due to commence.