Adding Resources in Microsoft Project
This article introduces you to adding resources in MS Project. Resources are the people, equipment, and materials needed to complete your project. This module will give an overview of how resources are used in Project 2010. You’ll learn how to add resources and view resource information. You’ll also learn how to assign resources to tasks. Finally, this module presents an introduction to leveling resources, which is a way to reschedule tasks so that your resources are not overscheduled.
For instructor-led Microsoft Project classes in Los Angeles call us on 888.815.0604.
Understanding Resources
There are three types of resources related to your project:
- Work
- Material
- Cost
The resources must be added to the project before they are available to assign to tasks.
There are three different types of resources in Project 2010: Work resources are the people included in your project plan. These are the people who will do the work of completing tasks related to the project.
Material resources are the items that are required to complete your project that are measured in units rather than work hours, such as cases of roofing shingles or gallons of paint.
Cost resources are fixed costs associated with your project, such as airfare or equipment rental.
Adding Resources
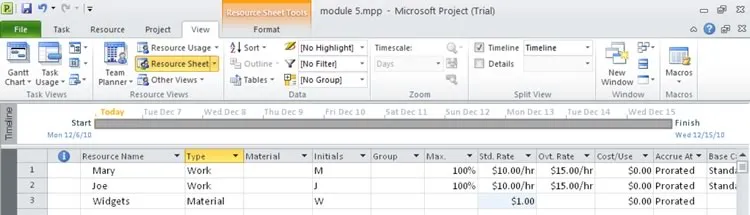
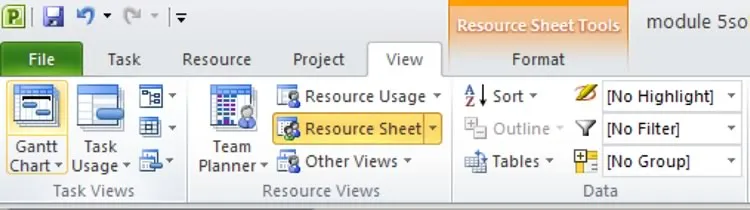
You’ll need to create your data base of resources before you can do anything else with your resource information. The Resource Sheet allows you to enter your resource information.
Use the following procedure to enter resources.
- Select the View tab from the Ribbon.
- Select Resource Sheet.

- Select the Resource tab from the Ribbon.
- Select Add Resources.
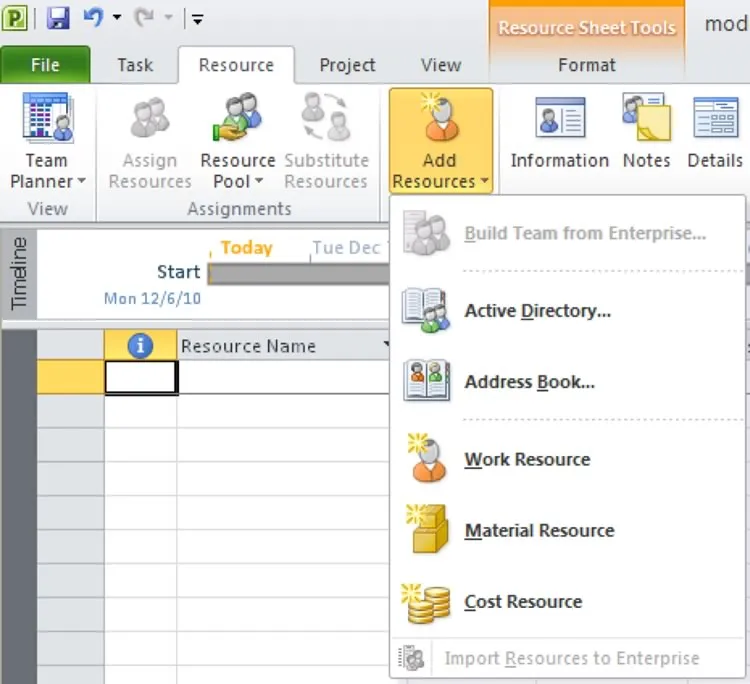
- You can add resources from your Active Directory or your Outlook Address Book. Or select Work Resource, Material Resource, or Cost Resource to add a resource of that type. You can also add a resource by entering information directly into the Resource sheet. Enter the Resource Name, the resource Type, and the Standard Rate for the resource in the Resource sheet. The standard rate can be indicated in different ways, including an hourly or annual rate for work resources and a per unit price for material resources.
- Make sure to save your work.
Viewing Resource Information
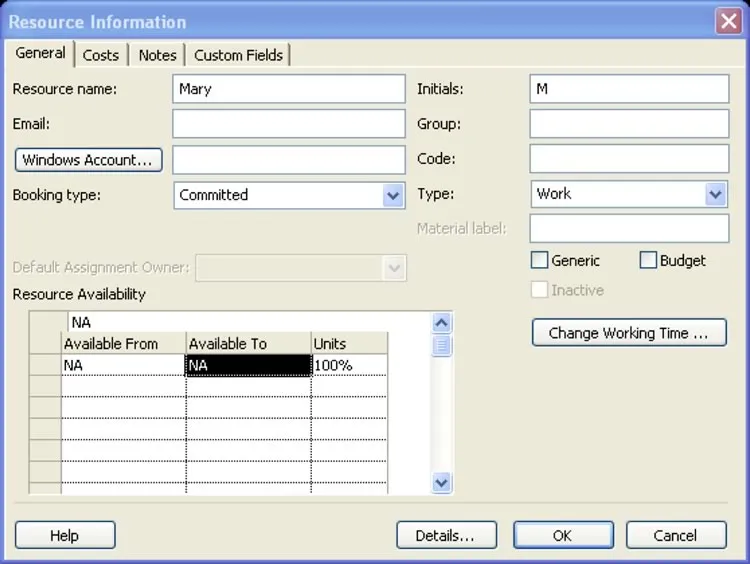
The Resource Information dialog box includes information about the resource, including availability and costs. You can also store notes about the resource and set up custom information.
Use the following procedure to view the Resource Information dialog box.
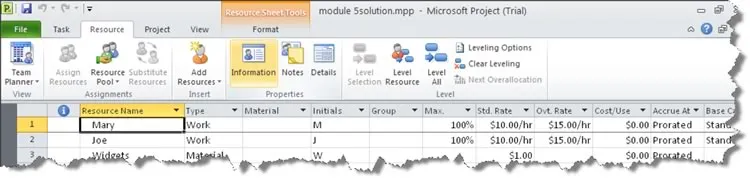
- Highlight the resource you want to view in the Resource Sheet.
- Select Information from the Resource tab on the Ribbon.
The General tab of the Resource Information dialog box includes basic information about the resource, including the name, email address, and resource type. Some more advanced options including the calendar and availability are also available on this tab.
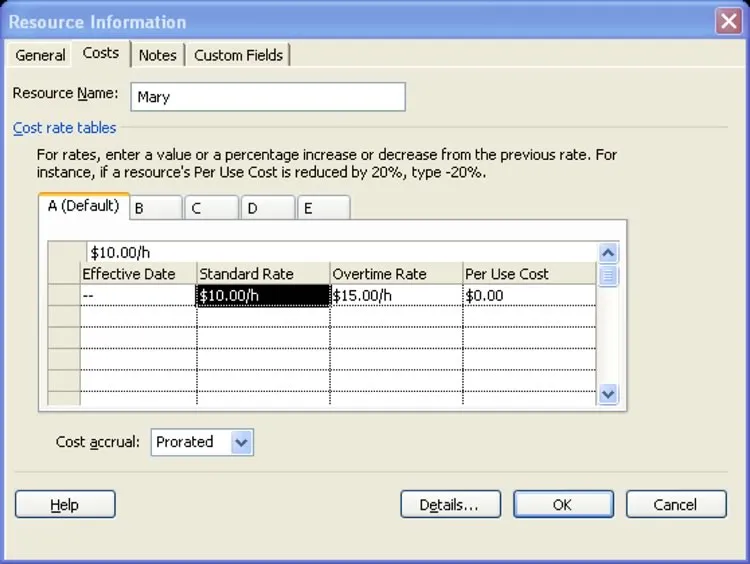
The Costs tab of the Resource Information dialog box includes information about the resource pay rates or costs.
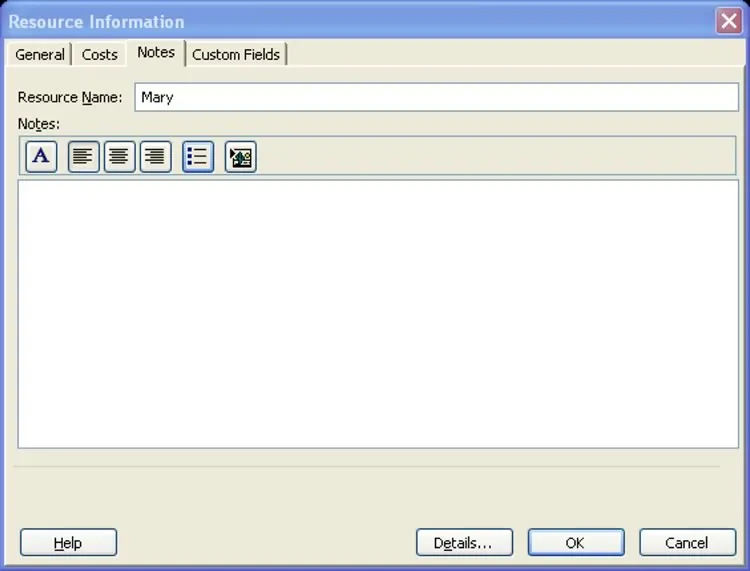
The Notes tab of the Resource Information dialog box allows you to include notes about the resource.
Adding Resources to Tasks
Once you have added resources to your project, you can assign resources to your tasks. You return to the task view to assign resources to individual tasks. You can assign more than one resource to each task.
Use the following procedure to assign a resource to a task.
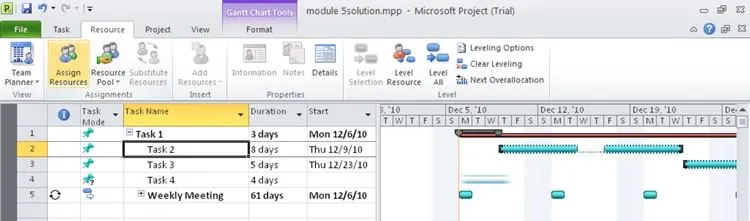
- Select Gantt Chart to return to the Gantt Chart view.
- Select the Resource tab from the Ribbon.
- Select a task from the task list.
- Select Assign Resources.
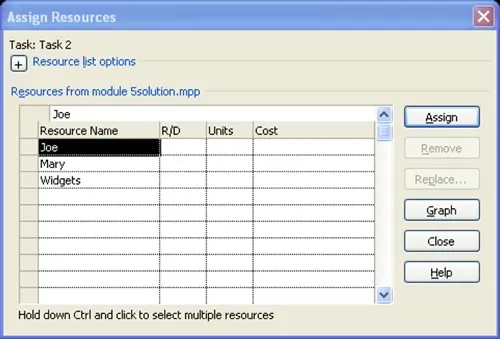
- Highlight one or more resources from the list. To select multiple resource, press the Shift or Ctrl key while selecting the resource name.
- Select Assign. You can also assign multiple resource individually by highlighting each resource and then clicking Assign.
- When you have finished assigning resources, select Close.
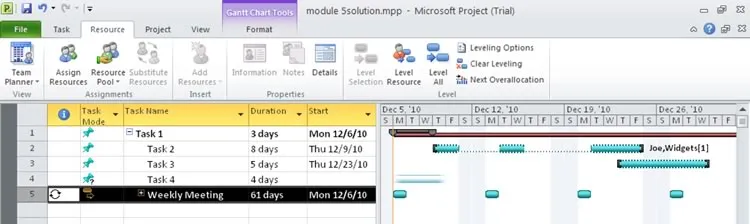
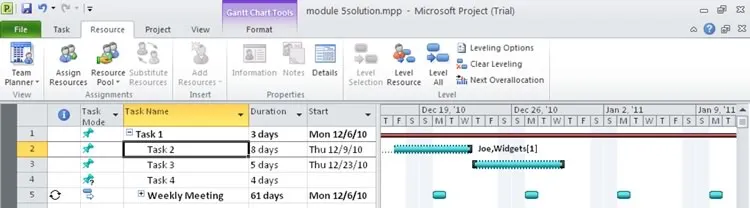
Notice the resource information has been added to the Gantt chart next to the duration bars.
Leveling Resources
The Level Resources tool in Project 2010 looks at task assignments for your resources and makes sure that a resource is not overscheduled. If task assignments for a given day cause a resource to be overscheduled, the affected tasks are rescheduled (sometimes by splitting or delaying tasks) so that the resource is not overallocated.
Use the following procedure to level resources.
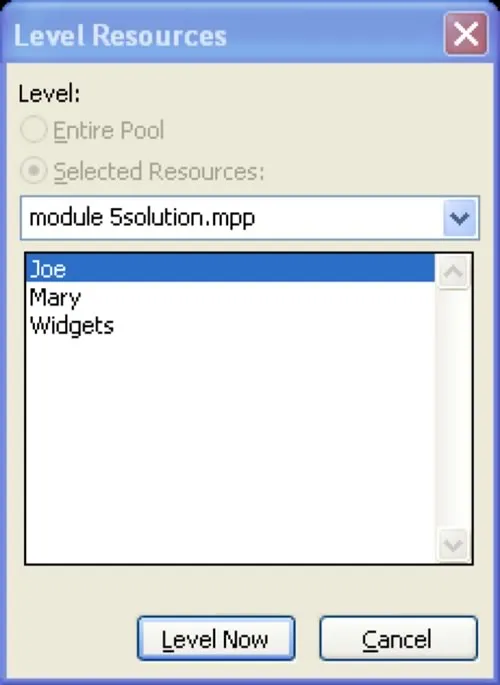
- Select Level Resource from the Resource tab on the Ribbon.

- Select the Resource you want to level.
- Select Level Now.
Notice how Task 2 has been split to accommodate Joe’s time at the Weekly meeting.