Adding Tasks in Microsoft Project
In this article, will delve a little deeper into understanding tasks. Project 2010 introduces manually scheduled tasks. You can also schedule tasks automatically using the Project scheduling engine. We’ll discuss the key terms for understanding tasks in this module. We’ll also learn how to view task information and sort and filter tasks. Finally, we’ll take a look at task indicators.
For instructor-led MS Project training in Los Angeles call us on 888.815.0604.
Understanding Key Terms
The key terms for understanding tasks in Project are:
- Duration
- Start date
- Finish date
- Gantt Chart
- Duration - is the amount of time a task will take to complete. When you are using manually scheduled tasks, you can enter anything that will help you schedule the tasks, such as “a couple of days” or “need to talk to Bob.” For automatically scheduled tasks, you must put a number with a unit indicator, such as d for days, h for hours, or w for weeks.
- Start Date - is when the project starts. For manually scheduled projects, this can be any text that will help you schedule tasks. For automatically scheduled tasks, it must be a date.
- Finish Date - is when the project will be completed. For manually scheduled projects, this can be any text that will help you schedule tasks. For automatically scheduled tasks, it must be a date.
- Resources - are the materials, people, and other costs associated with completing the project. Resources do not affect manually scheduled tasks, but do help Project to determine a schedule for automatically scheduled tasks.
- Gantt Chart - the default view is the Gantt Chart. The right side of this view includes bars that represent the task duration.
Viewing Task Information
Use the following procedure to view task information on the Task Information dialog box.
- Select the task you want to view. You can select the number to the left to highlight the task.
- Select Information from the Task tab on the Ribbon.
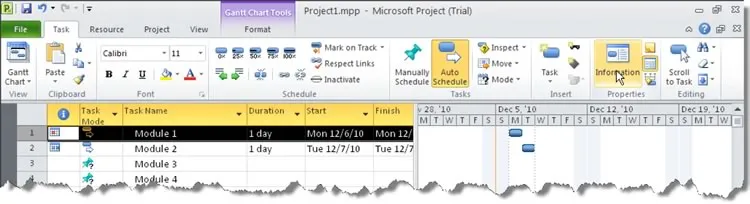
Review the Task Information dialog box.
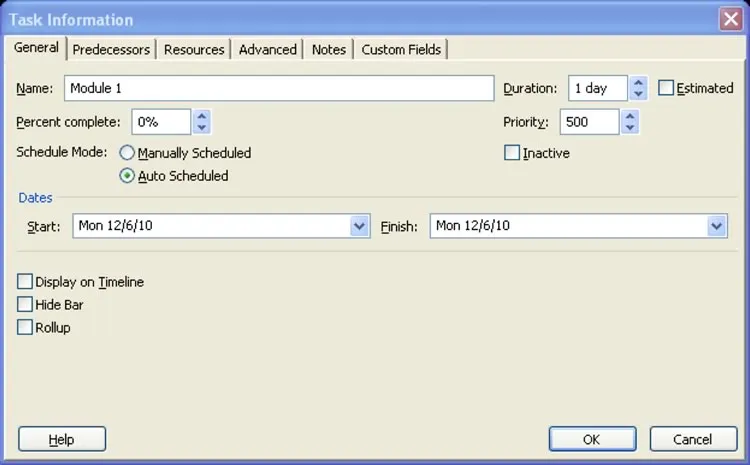
The General tab includes the following information:
- Task Name - the name of the task
- Percent complete - represents a percentage of how much of the task is complete
- Schedule Mode - select Manually or Auto
- Duration - indicates how long the task will take to complete
- Estimated - indicates that the selected duration is an estimate
- Priority - indicates a priority level in comparison with other tasks
- Inactive - makes the task inactive
- Start and Finish dates - indicates the start and finish date of the task, according to the indicated duration
- Display on Timeline - indicates that Project should display the task on the timeline
- Hide Bar - indicates that Project should hide the Gantt chart bar
- Rollup - indicates that Project should rollup the task with its summary task
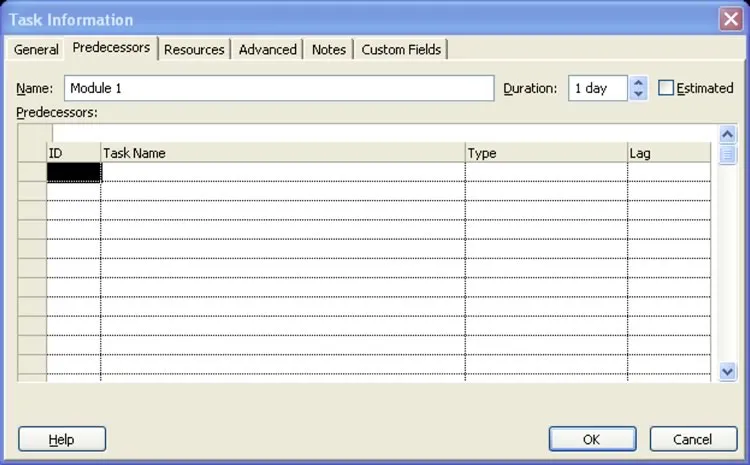
Review the other tabs briefly.
The Predecessors tab allows you to work with linked tasks and task relationships.
The Resources tab lists resources assigned to the task.

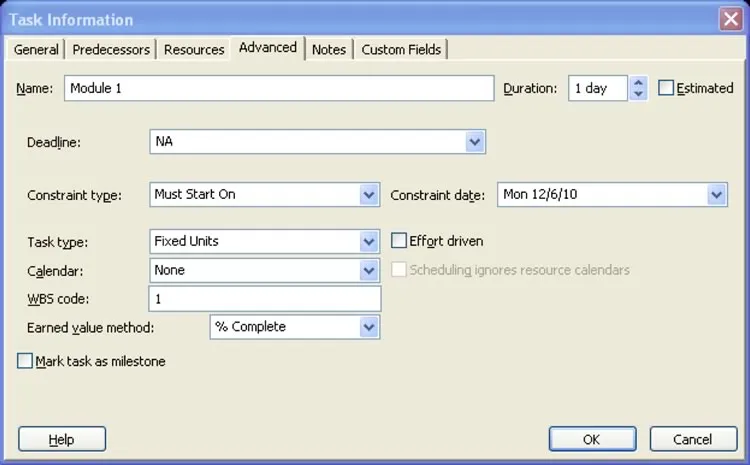
The Advanced tab allows you to set deadlines and constraints. It also includes the task type, WBS code (work breakdown structure) and the earned value method.
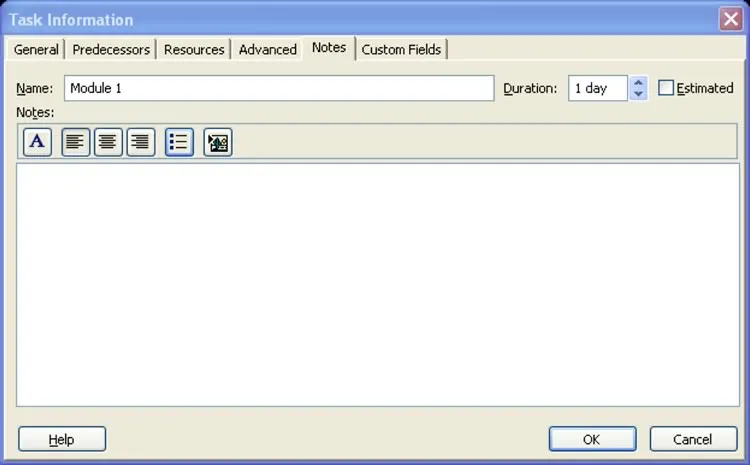
The Notes tab allows you to keep textual notes about the task.
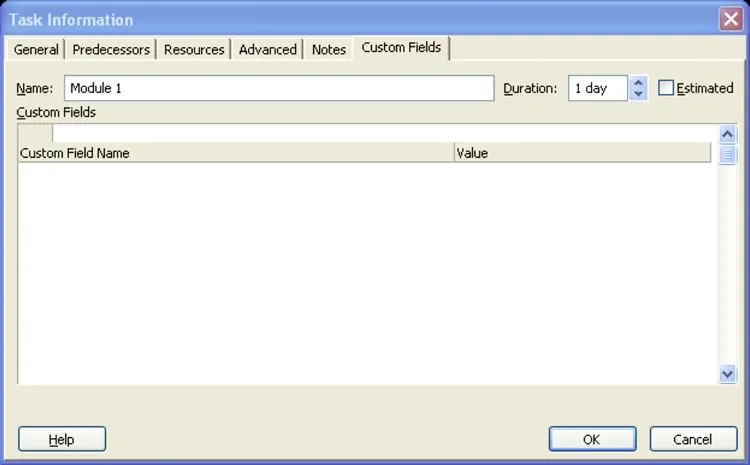
The Custom Fields tab allows you to include information in fields you have customized for the project.
Sorting and Filtering Tasks
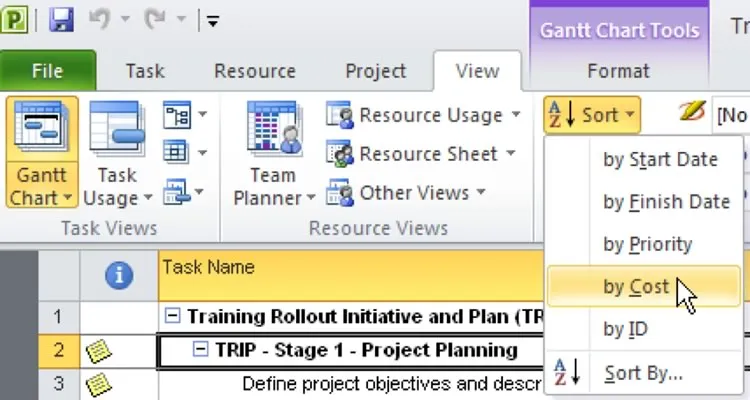
The View tab includes tools to sort and filter your task list. This can help you find a task in a long list of items, or filter the view to only include certain parts of the project.
Use the following procedure to see how to sort tasks.
- Select the View tab from the Ribbon.
- Select Sort.
- Select a sorting option.
Use the following procedure to view the Sort By dialog box.
- Select the View tab from the Ribbon.
- Select Sort.
- Select Sort By.
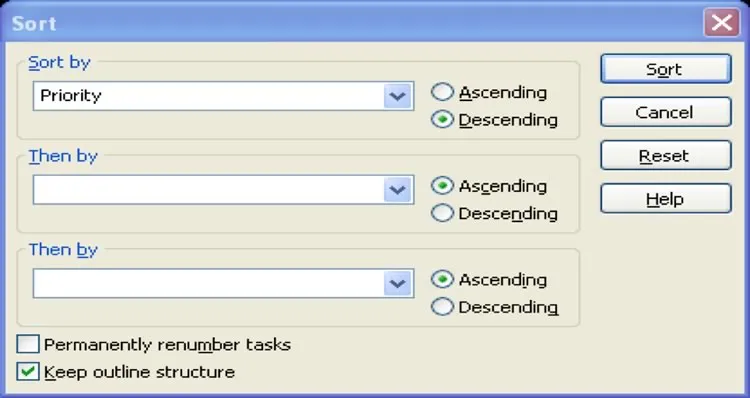
- You can select up to three options for sorting, and determine whether they should be sorted ascending or descending. Select Sort when you have finished.
Understanding Task Indicators
The following list explains some of the indicators associated with tasks:
- Note Task
- Hyperlink Task
- Deadline Task
- Inflexible Constraint
- Flexible Constraint
- Recurring Task
- Complete Task
- Task Calendar
Indicators provide valuable information. Remember to check the indicator column to find out details about a task. Point out that other views include indicators as well, such as the Resource view. For some views, you may need to add the Indicator field to show this information.
Think of the indicators in the sample project file. When you hover over the indicator, Project displays a hint for the meaning of the indicator.
