Creating a Clipping Mask in Photoshop
By Rhonda Jackson, Adobe Expert/ACI
There are a few go-to tips that can give your design project immediate punch and pizzazz. They add a lot of polish and a stamp of professionalism with minimal difficulty. One of my favorites is Creating a Clipping Mask.
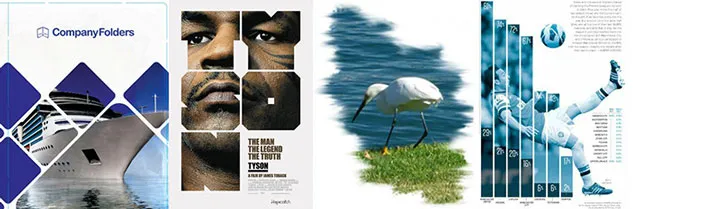
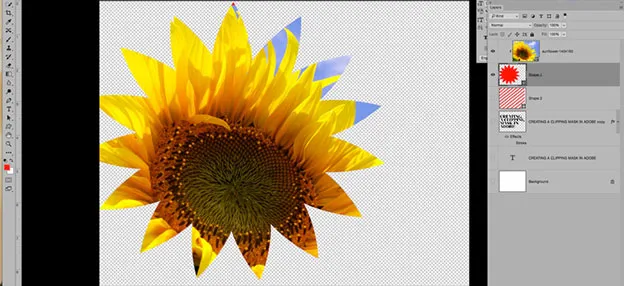
I'm sure you have seen those movie posters and advertisements where there's a photo coming through the shape of some text. It creates the 'wow' factor. You probably think it's an advanced feature of Photoshop but it's really pretty simple. It can be done with a shape or text. Here are the steps:
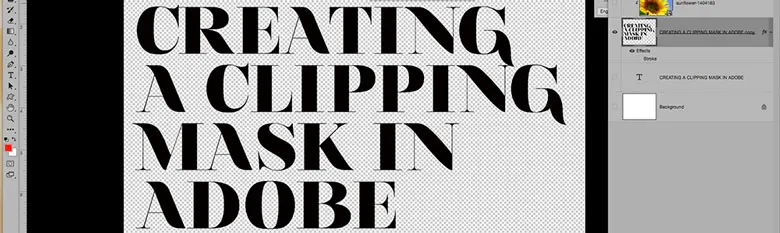
- Once you have your new document, grab your Type Tool and type the words for your project. It's best if you choose a font that has a heavy weight. If it's a narrow or script font, the letters are not wide enough for your image to show through. It's best to go with an Arial Black type font or a slab font like Rockwell.
Why not join one of our Adobe Photoshop classes in Los Angeles?
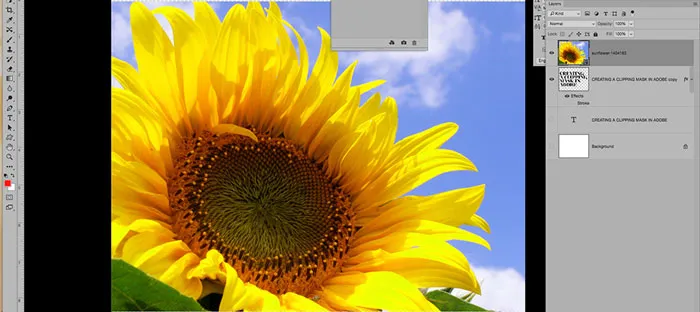
- Now you want to Place the image you want to feature through your text. It's very important that the Image is on top of the Type or the Shape.
- With the image layer selected you can either right-click that layer or select the drop-down menu on the Layers Panel.
- Select "Create Clipping Mask" from the drop down menu.

Voila! You now see your photo image through your type.

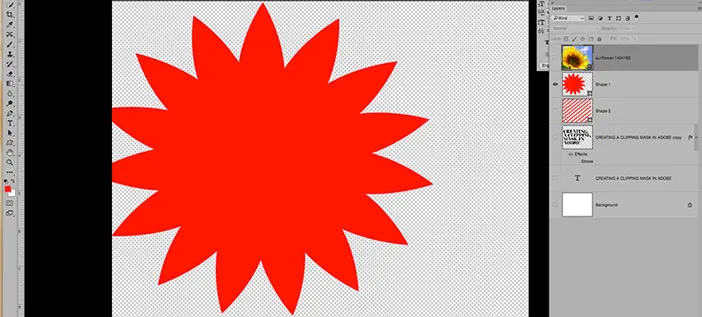
Repeat this process using a Shape instead of Type and you will show your image through your Shape.
Instant Magic!
Layer Styles
Layer Styles is another quick way to add some quick, impressive visuals to your design project. Layer Styles are special effects (also known as Blending Options) that you can apply to your text, shapes or images.
- Bevel & Emboss - gives your layer a lite 3-D effect.
- Outer Glow, Inner Glow, Drop Shadow & Inner Shadow - good for making your object/text stand out from the backgroundt
- Stroke - good for adding thickness to an object or text, for example cursive text which is normally thin.
- Color & Overlay - allows you to try out and preview different colors before making a selection or making a permanent edit.
- Pattern Overlay - adds texture
Once you select a Layer Style, The Layer Style dialog box opens up. All of the Style options are listed on the left side of the window. Make sure the Style you selected is highlighted. Otherwise you might not actually be making the edits on the right Style. The last settings for that Layer Style will immediately be applied to your Layer. Also check the Preview checkbox so that you can see your edits choices.
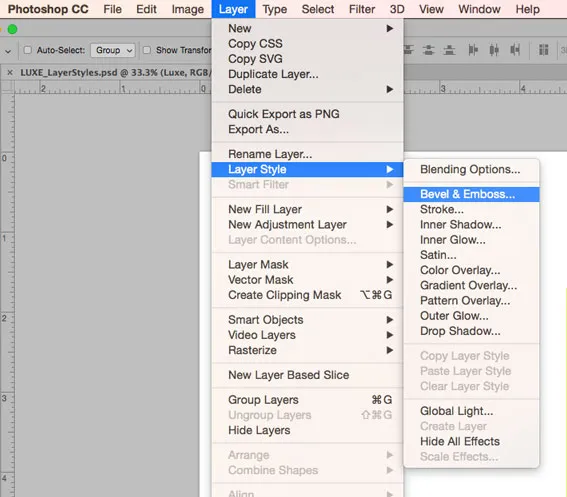
- Select Layer > Layer Style
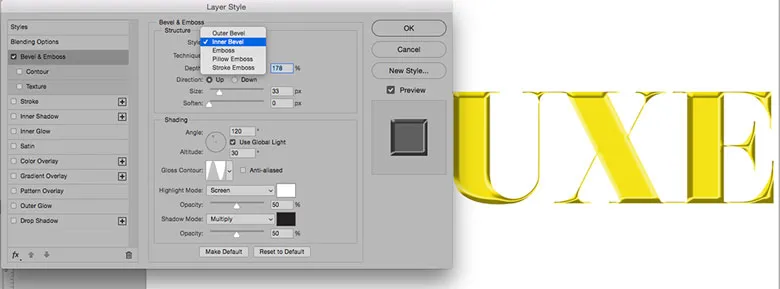
There are many options under Bevel & Emboss. We are going to focus on a few key options for this exercise. First you want to choose the type of Bevel you want to apply. You can choose from:
- Inner Bevel
- Outer Bevel
- Pillow Emboss
- Emboss
- Stroke Emboss (Only works if a Stroke Style is applied)
I normally move my dialog box to the side so that I can Preview my edits as I work. Start with selecting each one of the Bevel styles to see which one works best for your project.
- Select Inner Bevel.
The next option we are going to set is Bevel Technique. This determines the degree of emphasis of your bevel choice. Try out the three options:
- Chisel Soft
- Chisel Hard
- Smooth
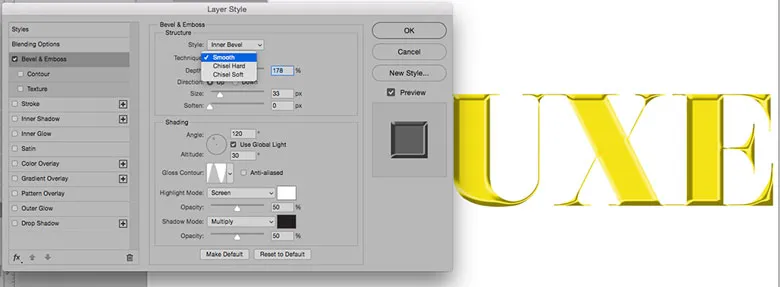
- Choose Smooth.
Play around with the Size, Depth and Direction options.
- Here are the settings for this project.
Depth: 170
Direction: Up
Size: 30
The curves options provide the most dramatic impact of all the settings. There are 12 curve options. Take some time and see the effect that each curve has on the text. Curves 3 (Cone-Inverted), 9 (Ring), 10 (Ring Double) and 12 (Sawtooth) tend to give a metallic look to your bevel.
- Select curve nine for this exercise, second curve on second row.
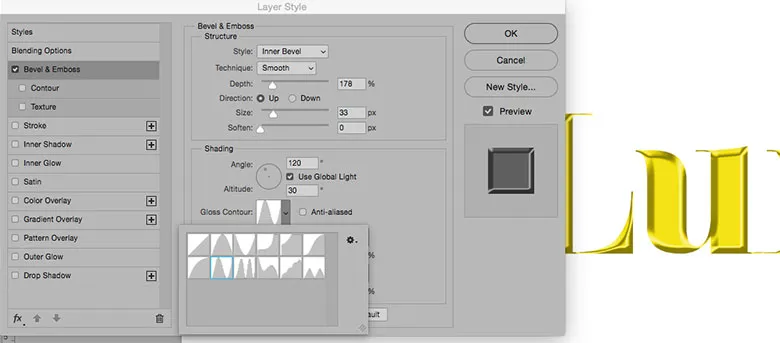
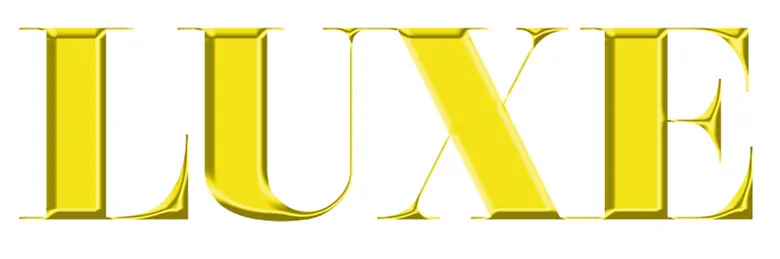
Leave all of the other default settings. Enjoy your bevelled, gold-plated text.
Benefits of using Layer Styles
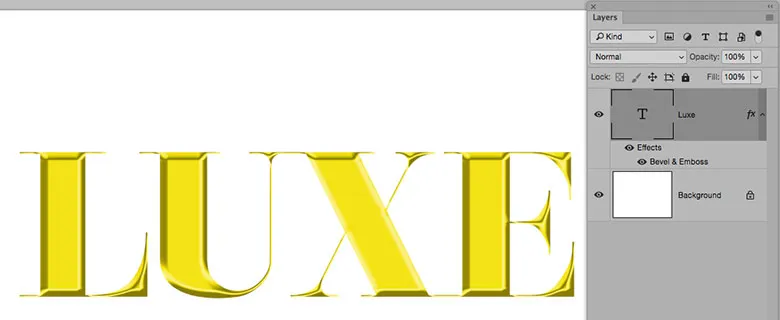
- Layer Styles are editable even after you close your image. They are attached to the layer versus being applied directly to the pixels.
- Layer Styles can be turned on or off from the Layer Panel after they have been applied.
- Layer Styles can be copied to other layers. This allows for consistency plus you don't have to remember all of your settings.
- You can save Layer Styles like you can Color Swatches. This way you can use the same Layer Styles in related projects.
These are just a few of the benefits of Layer Styles. It's a great way to add editable special effects to your projects.
